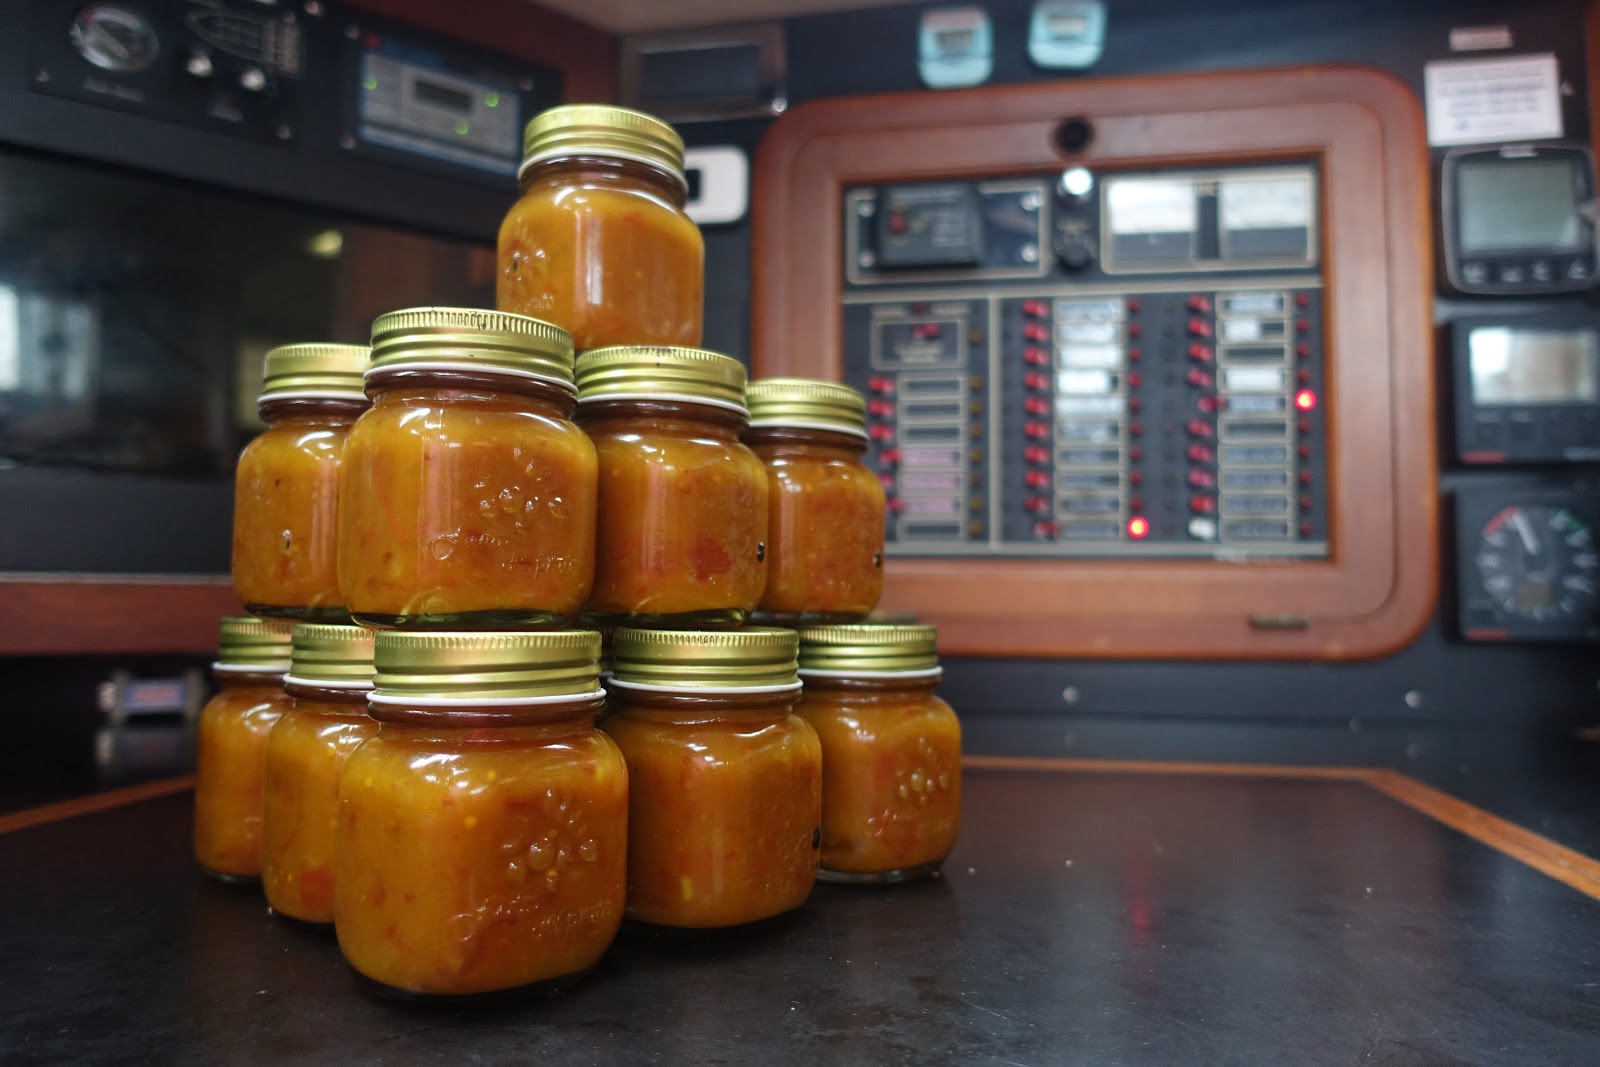
Showing posts with label cooking on a boat. Show all posts

Sunday, 1 September 2019

Quiche


4 Eggs
1 1/2 Cups milk  (or 3/4 cup of milk and 3/4 cup of cream)
1       Cup grated cheese
3 Shallots (or an onion)
3 Chopped bacon rashers (cooked)
1/2 Cup self raising flour (1/2 cup plain flour + 1 teaspoon of baking powder)
1 Small can corn kernels
1/2 Small capsicum seeded and diced

Method

To get better flavour from your quiche cook the shallots then add bacon, capsicum and finally the corn.  Leave in the frying pan to cool. Mix together the rest of the ingredients.

Once the cooked ingredients have cooled add these to the mix then pour into a larger flan/baking/pie dish. Bake at 180C for 45-60 minutes. Its cooked when it doesn't wobble when moved.

Optional: decorate the top with thinly sliced tomato and mushrooms, sprinkle with herbs and parsley.

Date roll

   
    1 cup dates, pitted and chopped (about 150g)
    1 cup (250ml) boiling water
    1 teaspoon baking soda (bicarbonate of soda)
    3/4 cup (155g) brown sugar
    60g butter
    1 teaspoon lemon or orange zest (orange is a nice alternative nice)
    1 egg
    2 cups (185g) self-raising flour (2 Cups plain flour and 4 teaspoons of baking powder)
    1 teaspoon mixed spice (we didn't use commercial but used ground nutmeg, allspice, cinnamon,          cardamon, cloves)

    1/2 cup walnut pieces <<<<< no thanks for us however we add additional dates


    Preheat oven to 180 degrees C. Grease and flour 2 cylindrical tins.
    Combine dates, baking soda, zest, butter and boiling water in a large bowl. Let stand for 15 minutes.
    Combine flour, sugar, nuts and egg in a large bowl. Add date mixture and stir well.
    Pour mixture into prepared tin(s). Close both ends and stand on a tray bake for 40-45 minutes.
    Cool in tin before serving sliced and spread with butter or margarine.

No cylindrical tin?

It's also fine to make this loaf in a loaf tin.

Thursday, 15 August 2019

Matilda's Hommus

Ingredients

1 400g Can Chick peas
1 Tbs Tahini or Smooth Peanut Butter
100 ml Yogurt/sour cream or Kewpie mayonnaise sauce
1 Pinch Cummin
2-3 Cloves Garlic
1 Lemon

1 Tbs  Morrocan seasoning or to taste ***Optional

If you like the store brought style of Hommus use the yogurt or sour cream to make a smooth consistency. I on the other hand don't really like store brought style and like to funk it up and make it smoother with the addition of Kewpie mayonnaise sauce. This delivers a sweeter smooth taste, and if I am serving it with raw seasonal crunchy veg crudités I like to add the Moroccan seasoning to gain another level of flavour. Be careful with the addition of lemon add only half the lemon juice and after blending taste, its very easy to make the mix too lemony, the same with the garlic; different seasons produce stronger flavours add 2 and taste test before adding more. Being as how Tahini is almost but impossible to source in some countries, peanut butter makes a great substitute. We also use freshly ground cummin seeds, because in the tropics the ground cummin seed powder goes off in a very short time.  When the cummin seeds are freshly ground it also adds better depth of flavour.

Ready to blend. 

This recipe requires you to hunt out a can of really good-quality chickpeas – they have much better flavour, so will guarantee an amazing result. Tip the jar of drained chickpeas, into a blender. Add the tahini, cummin and Kewpie mayonnaise sauce then peel and add the garlic. Squeeze in the lemon juice, then blitz in a small processor bowl or with a hand blender until smooth. Taste and season to perfection. If for some reason the mix appears to be too dry add some more Kewpie mayonnaise sauce, or even some good quality olive oil to smooth out the mixture.

Chill and serve with biscuits/crackers/crunchy veg crudités

We have found this hommus makes a great spread on fresh hot toast in the morning for breakfast.

Saturday, 13 July 2019

BBQ Sauce


Ingredients

    2 tablespoons butter
    1 small yellow onion, finely chopped (about 1 cup)
    3 cloves garlic, minced (about 1 tablespoon)
    2 cups ketchup (or our home made Tomato Sauce)
    1/3 cup molasses
    1/3 cup dark brown sugar
    1/3 cup apple cider vinegar
    2 tablespoon yellow mustard (I like pre-made mustard not the powder)
    1 Cinnamon stick
    1 tablespoon sweet paprika
    1 teaspoon freshly ground black pepper or to taste
 

1/2 teaspoon cayenne pepper **
1    tablespoon chili powder **
** Optional

Molasses is not that easy to get in some parts of Asia we use Black Treacle (Same Same but different) available at most baking supply shops in Malaysia.
We have found powered mustard has a very very short shelf life in the tropics, however prepared mustard has a good shelf life and does not require refrigeration. For us a good all rounder is Heinz yellow mustard, available on the Asian supermarket shelves.

Directions

    1.

    Melt butter in medium saucepan over medium heat. Add onion and cook until softened, about 5 minutes. Add garlic and cook until fragrant, about 30 seconds.
 
2.

    Add ketchup, molasses, brown sugar, vinegar, mustard, chili powder, black pepper, and cayenne pepper and stir to combine. Bring to a boil, then reduce heat to low and simmer until slightly thickened, about 30 minutes, stirring frequently.
 
3.

    Transfer sauce to the jar of a blender and blend until smooth. Let cool to room temperature, transfer to a jar and store in refrigerator for up to a month.


Look here for our Tomato Sauce Recipe

Home style Tomato Sauce

Our boat made tomato sauce

Ingredients

    2.5kg ripe tomatoes, coarsely chopped
    2 large onions, coarsely chopped
    10 whole cloves or 1/4 tsp ground
    10 whole allspice berries or 1/4 tsp ground
    1 tablespoon sweet paprika
    1 clove garlic, sliced
    1/2 cinnamon stick or 1/4 tsp ground
    2 tablespoons salt  (to taste but remember its a preservative)
    1 1/2 cups sugar
    2 cups (clear) white (white malt) vinegar

I have also found you can easily funk up tomato sauce with some mustard, its a taste thing so try a small test sample before adding it to a whole batch. We use prepared mustard as it keeps longer in the tropics than powered mustard.

Select all ingredients
Method

    Step 1
    Place tomato, onion, cloves, berries, paprika, garlic, cinnamon and salt in a large saucepan over medium heat. Bring to the boil. Simmer, uncovered, stirring occasionally, for 1 hour or until the tomato breaks down and is tender.
    Step 2
    Add the sugar and vinegar. Simmer, uncovered, stirring occasionally, for a further hour and 15 minutes or until mixture reduces, thickens and is of a saucy consistency. Adjust seasoning.
    Step 3
    Strain mixture through a coarse sieve into a large bowl, in batches, pressing down strongly to extract as much liquid as possible. Discard solids, seeds. Pour hot mixture into sterilised bottles. Seal. Store in a cool, dark place until ready to use. Once opened, store in the fridge.

This Tomato Sauce is a great starting point for our home made BBQ sauce.


Friday, 22 March 2019

Broccoli and Pasta Salad


Broccoli Salad a delicious mix of  simple ingredients and a lively dressing


1 large head of broccoli, cut into florets
1 Red Capsicum
1 Small can corn kernels
1 Stick celery
1 Small red onion
1 Julian sliced carrot

2 Cups (uncooked) of pasta spirals, panini, shells large or small, cook as per packet instructions
normal not al dente

Dressing
1/2  Cup of 5% salad vinegar
1/2 Cup olive oil
2 Table spoons of caster sugar
1 1/2  Table spoons of madras curry powder

Combine and shake vigorously.

In a large sauce pan add sufficient water to cook the pasta, but Firstly cook the broccoli for 5 minutes in the boiling water (water at the boil before adding broccoli), scoop the broccoli from the pan with a slotted spoon and place into cool water, add a teaspoon of salt to the water return to the boil and now cook the pasta. When the pasta is cooked remove from the pan and rinse in cool water, drain in a colander and mix through the broccoli and refrigerate.

Once the pasta and broccoli mix is cold add the remaining ingredients, and toss together in a mixing bowl, add the dressing and serve straight away.

Additional
2 Rashers of bacon well cooked cut into 1 cm squares
or
8 Slices of salami cooked and cut into squares

8 Cherry tomatoes quartered

Toss through the salad

Tuesday, 26 February 2019

Matilda's Chocolate Cake No 1

A simple, easy to make but very tasty Chocolate Cake

1/2 Cup Sugar
1 TBS Butter
1 Cup Flour
2 TSP Baking powder
1/4 Cup Milk
1/4 Cup Water
1 TBS Golden Syrup
1 Egg
1 TBS Cocoa
1/2 TSP Bi-Carb. Soda

Beat butter and sugar to a cream, add egg, then syrup. (we use a hand whisk) Beat in the sifted flour, baking powder and cocoa, then add in the milk. Finally add in the bi-carb soda.

The mixture will be very moist, this is how its supposed to be. Bake in a 8" 20 cm sandwich tin in a 180 deg C (375 deg F) oven for 3/4 of an hour. We start checking after 1/2 an hour as our oven can be a bit fast.

1 TBS =  20 ml
1 TSP =   5 ml
1 Cup = 250 ml

Ice the top by mixing 2 TBS butter, with 2 TBS cocoa and enough icing sugar to make a workable icing, you may add a little water if the mix becomes to thick. When the cake has cooled spoon icing on to the top of the cake and spread out with the back of the spoon

Saturday, 19 January 2019

ANZAC Biscuits


125g Butter
2         Tbs golden syrup
1         Tsp Baking soda
1         Tbs Boiling water
1/2         Cups Coconut
1         Cup rolled oats
3/4         Cup of flour

Melt butter golden syrup in a saucepan large enough to hold and mix all ingredients. Once melted cool slightly, Dissolve baking soda in in the tablespoon of boiling water and add to the sauce pan with the remaining ingredients. Mix well. Place rounded teaspoon of mixture on to an oven tray covered with baking paper, (alternative is a greased baking tray), allowing room for spreading, flatten the balls with the back of a spoon.

Bake at 180 deg C for 10-15 minutes or until golden.

Remove from tray quickly after removing from the oven and cool on a wire rack. Store in an air tight container.

Matilda's Tomato Chutney


This chutney works as a condiment with all sorts of food, we use it in place of tomato sauce or ketchup on burgers. It's great when we put together a plough-mans lunch, or add it on sandwiches.  We have also found its great with sausages and mash, and as a side on an after dinner cheese board or spread on crackers as a pre-dinner drinks snack.

INGREDIENTS
·         1 ½ kilos ripe tomatoes (vine ripened are very good)
·         ½ kilo onions (we use brown)
·         ½ kilo sugar
·         2 teaspoons of salt
·         Pepper to taste
·         1 tablespoon curry powder
·         1 ½ tablespoons mustard
·         2 tablespoons plain flour
·         Vinegar – white (don’t use brown or apple cider)

METHOD
·        Slice tomatoes and onions evenly
·        In a large boiler add the onions and tomatoes
·       Add the salt & sugar
·      Cover with vinegar
·       Bring to the boil and then simmer for 20 minutes with the lid on
·       Mix the curry powder, mustard & flour together into a paste with a bit of vinegar to a thick consistency like cream and then power slowly into the chutney mix stirring while doing so
·       Add a few grinds of pepper
·       Simmer for 30 minutes with the lid on
·       Taste for any salt or sugar adjustment
·       Put a teaspoon of the mix onto a plate and let it cool – to check the thickness you should be able to turn the plate upside down and not have the mixture fall off straight away.
·       If it’s too runny mix another tablespoon of plain flour in vinegar to make a paste and add to the chutney mix.

PRESERVING JARS
·         You will need about 4 x 350gram preserving jars (buy them from supermarket– red and white lids)
·         Wash in very hot water
·         Spoon the hot chutney mix in
·         Put the lids on and turn upside down on a protected surface and leave until cool


Bruce's Tomato Chutney


Discover this easy tomato chutney recipe, the perfect way to complement a piece of hard cheese; try this recipe today. Perfect on toast with a chunk of cheddar.

INGREDIENTS
•             2 kilos ripe roma tomatoes
•             3/4 kilo onions (we use brown)
•             2 capsicums (red Bell Peppers) 
•             3/4 kilo sugar
•             2 teaspoons of salt
•             Pepper to taste
•             2 tablespoons plain flour
•             Vinegar – Red wine & Balsamic 50/50 (don’t use white, brown or apple cider)

METHOD
•             Slice tomatoes and onions evenly
•             In a large boiler add the onions and tomatoes
•             Add the salt & sugar
•             Cover with vinegar
•             Bring to the boil and then simmer for 20 minutes with the lid on
•             Mix the flour together into a paste with a bit of vinegar to a thick consistency like cream                      and then pour slowly into the chutney mix stirring while doing so
•             Add a few grinds of pepper
•             Simmer for 30 minutes with the lid on
•             Taste for any salt or sugar adjustment
•             Put a teaspoon of the mix onto a plate and let it cool – to check the thickness you should be                 able to turn the plate upside down and not have the mixture fall off straight away.
•             If it’s too runny cook for a further 20 minutes, then if its still too runny mix another                              tablespoon of plain flour in vinegar to make a paste and add to the chutney mix.

PRESERVING JARS
•             You will need about 6 x 300 gram preserving jars (red and white lids)
•             Wash in very hot water
•             Spoon the hot chutney mix in
•             Put the lids on and turn upside down on a protected surface and leave until cool

Oven roasted  capsicums (Bell Peppers) are a nice addition to this recipe in place of fresh ones. 

Lemon Cake


Forget about making lemonade when you have lemons. Save them to whip this little beauty up and enjoy the fresh clean zingy taste of lemons in this wonderfully textured cake. Its a double delight with the flavour bursting from the top and bottom of the cake. If anything's worth taking a little tea break for, it's a wedge of this lemon cake.

120         g butter
1        cup fine granulated sugar
2        eggs
2        Tbs lemon zest
1 1/2 cups flour
1/4         tsp baking soda
1/2         tsp baking powder
1/2         tsp salt
1 1/2 tbs  Lemon Juice
100         ml  cream / butter milk
1         tsp vanilla extract

lemon syrup:
1/4           Cup fine granulated sugar
1/4           Cup Lemon Juice

Icing:
1               Cup icing sugar
1 3/4         Tbs lemon juice (enough to make a thick smooth mixture)

Preheat oven to 180°C / 350°F.
Grease and flour 1 x 8 1/2 inch pan, lining the bottom with baking paper.

Cream, using whisk, butter and 1 cup of fine granulated sugar in bowl till light and fluffy.
Whisking add eggs, 1 at a time, and the lemon zest.
Sift together flour, baking powder, baking soda and salt into a bowl.

In another bowl, combine 1 1/2 tbs lemon juice, cream or buttermilk and vanilla.
Whisking together until smooth. Alternately add flour and buttermilk mixtures to batter, beginning and ending with flour mixture.

Pour batter into the pan and smooth the top.
Bake 45 minutes- 1 hour, until tester comes out clean.

When the cake is cooked, cool 10 minutes.

Meanwhile, combine 1/4 C fine granulated sugar and 1/4 C lemon juice in small saucepan, cooking over low heat until sugar dissolves.

Remove cake from pan and set on wire rack over a larger baking tray (best to set upside down on rack so that syrup is spooned onto the bottom of the cake as it will absorb better than spooning over the top).

Spoon and spread lemon syrup over base of the cake.

Allow the cake to cool completely.

Icing: Combine sifted icing sugar and lemon juice in a bowl, mixing with whisk until smooth.

Ginger Crunch


Ginger Crunch Slice is just like Nanna used to bake. It has a caramelly and gooey ginger crunch on top and a delicious shortbread style biscuit underneath.  The two together are a fantastic. Serve this slice in tiny squares, with a fresh pot of tea or coffee.

150g Butter
1/2         Cup sugar
1 1/2 Cups flour
1         Tsp Baking powder
1 1/2 Tsp Ground Ginger
1         Tbs finely grated fresh Ginger

Ginger Icing
50g Butter
1 Tbs golden syrup
1/2 Cup icing sugar
1/2 Tsp ground ginger
1/4 Cup crystallised Ginger finely chopped

The Crunch
Melt butter on a very low heat in a saucepan big enough to mix all the ingredients. Remove from heat and mix in the sugar, sift the flour, baking powder and ginger into the saucepan. Mix until combined then press into a 30 x 20 cm cake tin. Bake at 180 deg C for 20 - 25 minutes until lightly golden. Ice when still warm and cut into squares. Sprinkle with crystallised Ginger.

Ginger Icing
Melt butter and golden syrup, mix in icing sugar and ginger  until well combined.

Apple Tea Cake

Image courtesy of Google.
The thing I like about this cake is its simplicity, it is not overly sweet and doesn't require a great deal of butter/margarine as some cakes do. An electric mixer is not required, this one is easily whipped up with a hand held whisk.

Apple Tea Cake Ingredients
1 Level Tbs marg or butter
4 Level Tbs sugar
1 egg
1/2 cup milk
1 Tbs milk
1 Heaped cup flour
2 Tsp baking powder
1 pinch salt
1 Tsp vanilla essence

Base Ingredients
Apple slices usually one apple is enough
1 Tsp Cinnamon
2 Tbs brown sugar
1/2 Tbs butter

Turn on the oven to 180 deg C

To prepare the base:
Cut a round of baking paper to fit a 20cm round cake tin
Grease/oil the cake tin
Place the baking paper round in the cake tin
Sprinkle the base with brown sugar and Cinnamon
Cut small pieces of butter and place into the brown sugar
Arrange the rounds or thin slices of apple over the base to totally cover the bake paper
Set aside and make the cake batter.

The cake batter:
Whisk butter and sugar together in a bowl, add egg and all moist ingredients in a bowl, whisk until well combined. Sift in flour and baking powder gradually until well combined and is a smooth batter. Pour into the cake tin on top of the apple slices.

Place in the centre rack of the stove and cook for 20 - 30 Minutes cake is cooked when a skewer comes out clean.
Let cooked cake cool for 10 minutes in the pan. Loosen around the edges with a knife, turn out onto a wire rack, turn the cake over on to its base leaving the paper on.

When cool cut into wedged serve and enjoy

To simplify cake just oil/grease the tin, place in the batter, cover the top with the apple slices and sprinkle with cinnamon and sugar. Cook as per the instructions.

To really simplify the cake just omit the apple all together and sprinkle the brown sugar and cinnamon on the top when cooked. However it just wont taste as good as the full recipe cake with the caramelised apple slices in cinnamon on the base.

Notes:
We no longer use self-raising flour, this is for a couple of reasons, being on a boat it helps with storage not having to carry 3 or 4 variety's of flour. For example plain self-raising whole grain and bread making flour. We also found the raising agents don't work as well as the flour is coming toward the use by date. This time is also reduced in the warmer weather of Asia. So by adding the raising ingredient when mixing we have found the finish product has risen better.