
The best tender for a yacht has to fulfill a whole range of criteria and that will partly be dictated by your own personal needs and experiences.
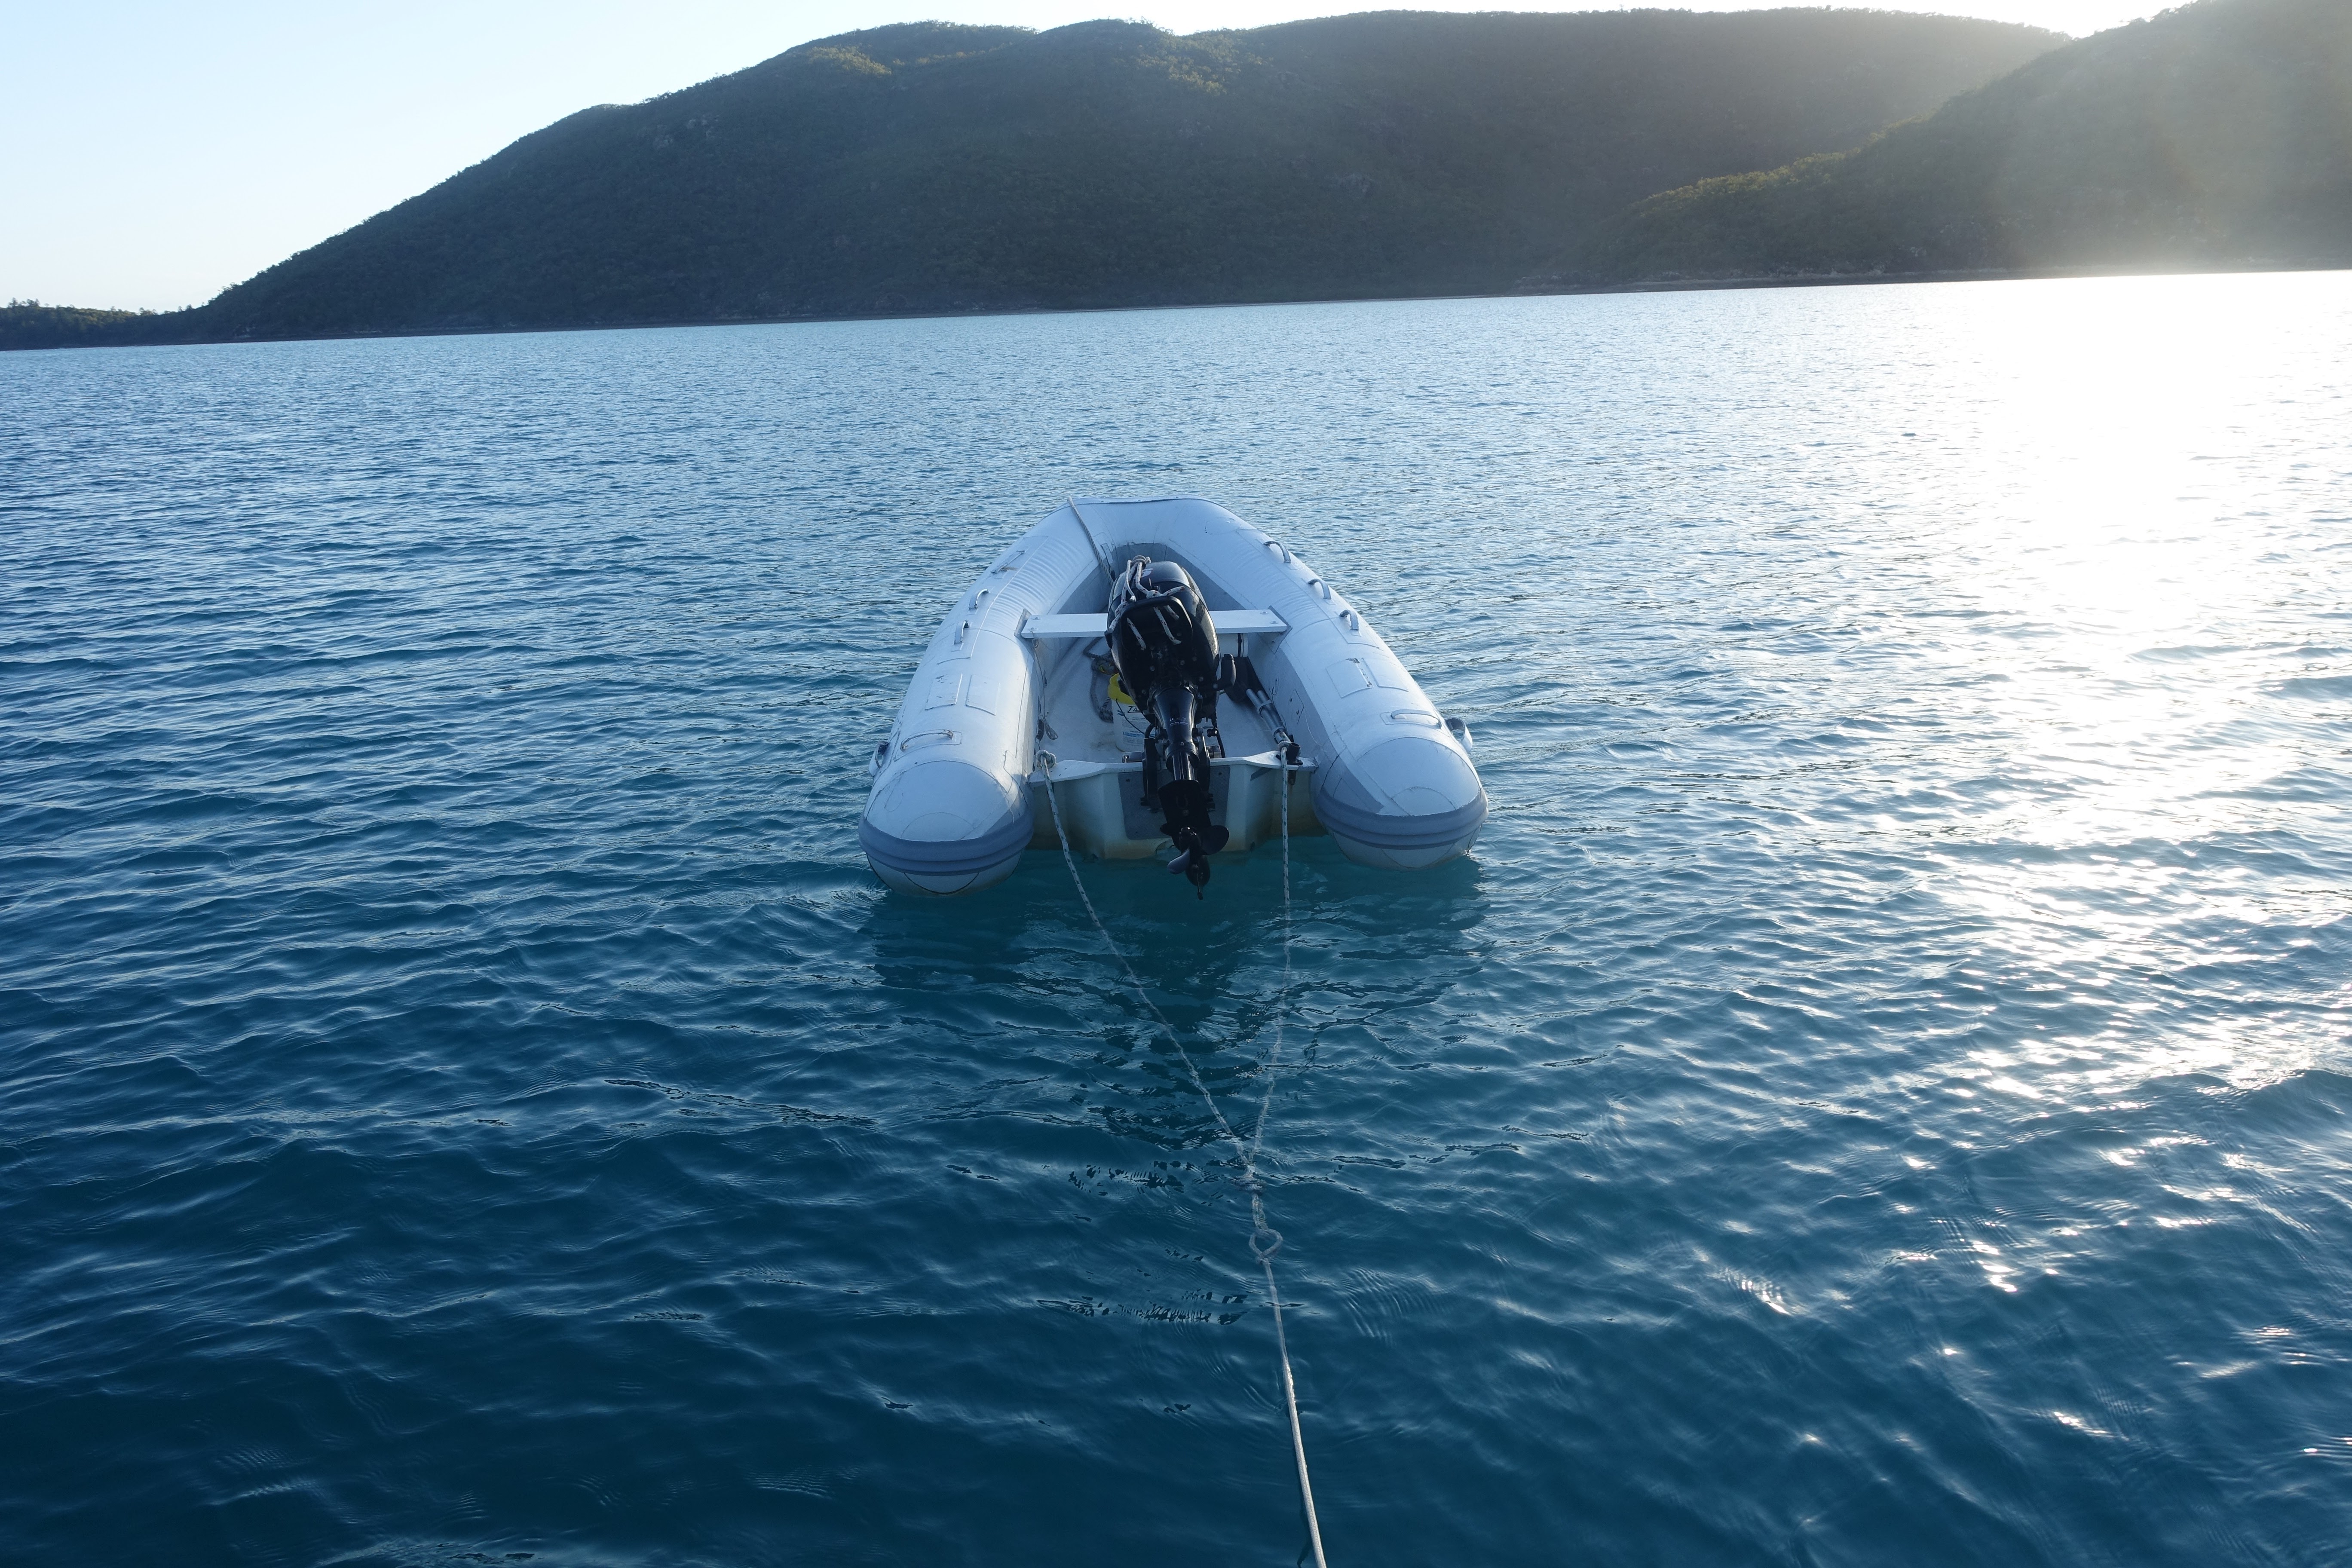
There are so many different styles and shapes of tender on the market, some lend themselves to being work horses hauling the food supplies and beverages out to a yacht at anchor with ease. Then there are the show ponies, centre console and a large outboard. These are more suited to a quick run to the beach, most of the time they are heavy due to the configuration and dragging them up to the high water mark while ashore is likely to give you a hernia or heart attack whichever comes first. We have found due to the configuration its hard to do a resupply thanks to the lack of space, and these boats are not really suited to remote location cruising. It can be done of course by hiring a run about to bring out the supplies. Then there are of course the tenders that spend a second life as a fishing boat. We have found waterline length certainly makes a difference to speed, and while there are those who are fine with a small out board when venturing into remote areas, it could be a lot safer to have a bit of horse power under the hood so to speak. We have been in areas where the currents can run at 6-7 knots, so a bit of horse power is needed to get around. I also remember zooming over a large sandbar strewn bay near sunset to take photos before the light changed too much. If we were not able to get up on the plane then we would have missed the opportunity, of course we could have started our trip earlier but we would not have been back until well after the sun had set. These are the things to consider when purchasing a tender, we found the bigger the tubes the better, a bit of length certainly helps get on the plane, a flat floor or a floor added over a deep V floor is good and is a lot safer getting in and out of the tender when tied along side.
While its a difficult ask these days, a two stroke engine can be a useful addition to a cruising yacht when going offshore. This is our experience, we went off shore with a nice new four stroke engine and after a few short months of relying on it we were celebrating when we sold it and purchased a two stroke. Yes there will be a lot of people thinking we are environmental vandals, how ever our safety and the ability to head ashore and actually make it were high on our list of desirable things an outboard should be capable of. The only thing and this is the only plus is the four stroke fuel economy was good, unfortunately the four stroke wasn't reliable, it had a poor weight to HP ratio, and the ongoing repairs and need for maintenance was cutting into the cruising budget. So what was the problems, consistent condensation in the carburettor fuel bowl causing the engine to stop when a drop of water blocked the jet. In a two year period the rubber drive in the propeller(s) was replaced or the propeller replaced eighteen times (18). Changing the oil was a real pain in the neck due to design. The next safety issue was the slightest kick back when starting would smash the plastic pieces in the pullcord mechanism. Then to add to the grief of the pull cord becoming unoperational, the way the flywheel was cast did not lend itself to easily using an emergency start cord. The connector for the external tank would take a chunk out of the seal when plugging it on to the outboard, then after 2-3 connections the motor would suck air through the damaged seal. Then to add insult to injury if you didn't use the outboard for a week or fortnight the interior of the carburettor would start to corrode when the fuel evaporated. The white powder from the corrosion would then block the jet in the carburettor when you next start the motor. Yeah happy happy times! All that aside I hope some of the info collected here is of use.
 |
| The smashed plastic parts in the pull starter, from a back kick when starting |
As we have become more knowledgeable through our own experiences we have also learnt from others. I would like to share some of what we have learnt about reducing the risks when using tenders. These little boats really are our connection to the outside world and hard working pack horses come resupply day. Unfortunately the risks are real and some have paid the ultimate price by not recognising the potential danger.
When we are sailing around our local bay enjoying the anchorages it’s a very rare occurrence to be there alone. In the bay most anchorages allow us to anchor close to the beach and it’s possible to easily row back to the boat or summon help from passing or anchored vessels. When we started exploring out side the bay we didn’t give a great deal of thought to how easy it would be to become like Robinson Crusoe using the tender to go ashore.
We found it’s not hard to become stranded in sight of your own vessel. In some cases it has been much worse for a few people. Since moving further afield, talking with others and after our own personal experiences we have been wakened out of our complacency. You know Complacency: a feeling of contentment, especially when coupled with an unawareness of danger. So what’s the danger? If you haven’t thought about it here are a few.
We have heard through the grapevine and read several stories about others experiences both good and bad; these have ranged from forced overnight stays on mosquito infested beaches to being washed away on a tide. What if the weather turns? and you are not able to return to your anchored vessel. Or you could become stranded if the motor fails and you’re against the tide or it’s too far or perhaps you are injured and are unable to row back. Those that have been washed away on the tide and have travelled for miles with no water and little protection from the elements, luckily in these cases they were found by passing ships but it was several days later. One couple we read about was almost washed from a mid ocean coral cay when their tender motor wasn’t powerful enough against the outgoing tidal flow. They found themselves standing barefoot on coral holding their tender to stop it from being washed away while waiting for the tide to turn. Then once the tide turned it allowed them to motor back to their vessel on the little remaining fuel they had.
One other danger that was highlighted during a recent incident was that a person using a tender fell over board. If being in the water wasn’t bad enough the real trouble began when they could not reboard their tender from the water. It is a worthwhile experiment to test your tender has sufficient stable buoyancy to accommodate a person being able to climb back on board from the water. I know that with some inflatable’s even moderately unfit persons can reboard over the stern using the outboard as a step, if the out board is fitted with a wing. Unfortunately this may not be possible for all combinations of motor and tender. What if you cannot reboard your tender from the water? It is certainly in your best interests to look at ways to make it possible to get back on board. This is especially important if you are in the higher latitudes, hypothermia will quickly set in once you’re in the water and make it almost impossible to swim back to shore or climb up on to the main vessel. While there are ever growing lists of problems people find themselves in, I think this small cross section should have given you an idea of the multitude of perils if you ignore the hazards. Since writing this we made a fold up ladder to keep in the tender just in case we or someone else fall overboard.
We now carry additional gear in our tender as well as a safety box so we can summon help or do minor repairs should they be necessary. However the safety box is only good if you take it with you. We didn’t once and when we had finished our walk and swim at the beach we couldn’t get the motor back down. Luckily we were able to flag down a passing fisherman. Incredibly he didn’t have any tools on board but was kind enough to run us to our vessel and back with the tools for the repair. I have listed the contents of our tender safety box and what we carry in our tender. While the lists may look excessive it’s a matter of adjusting it to suit the situation.
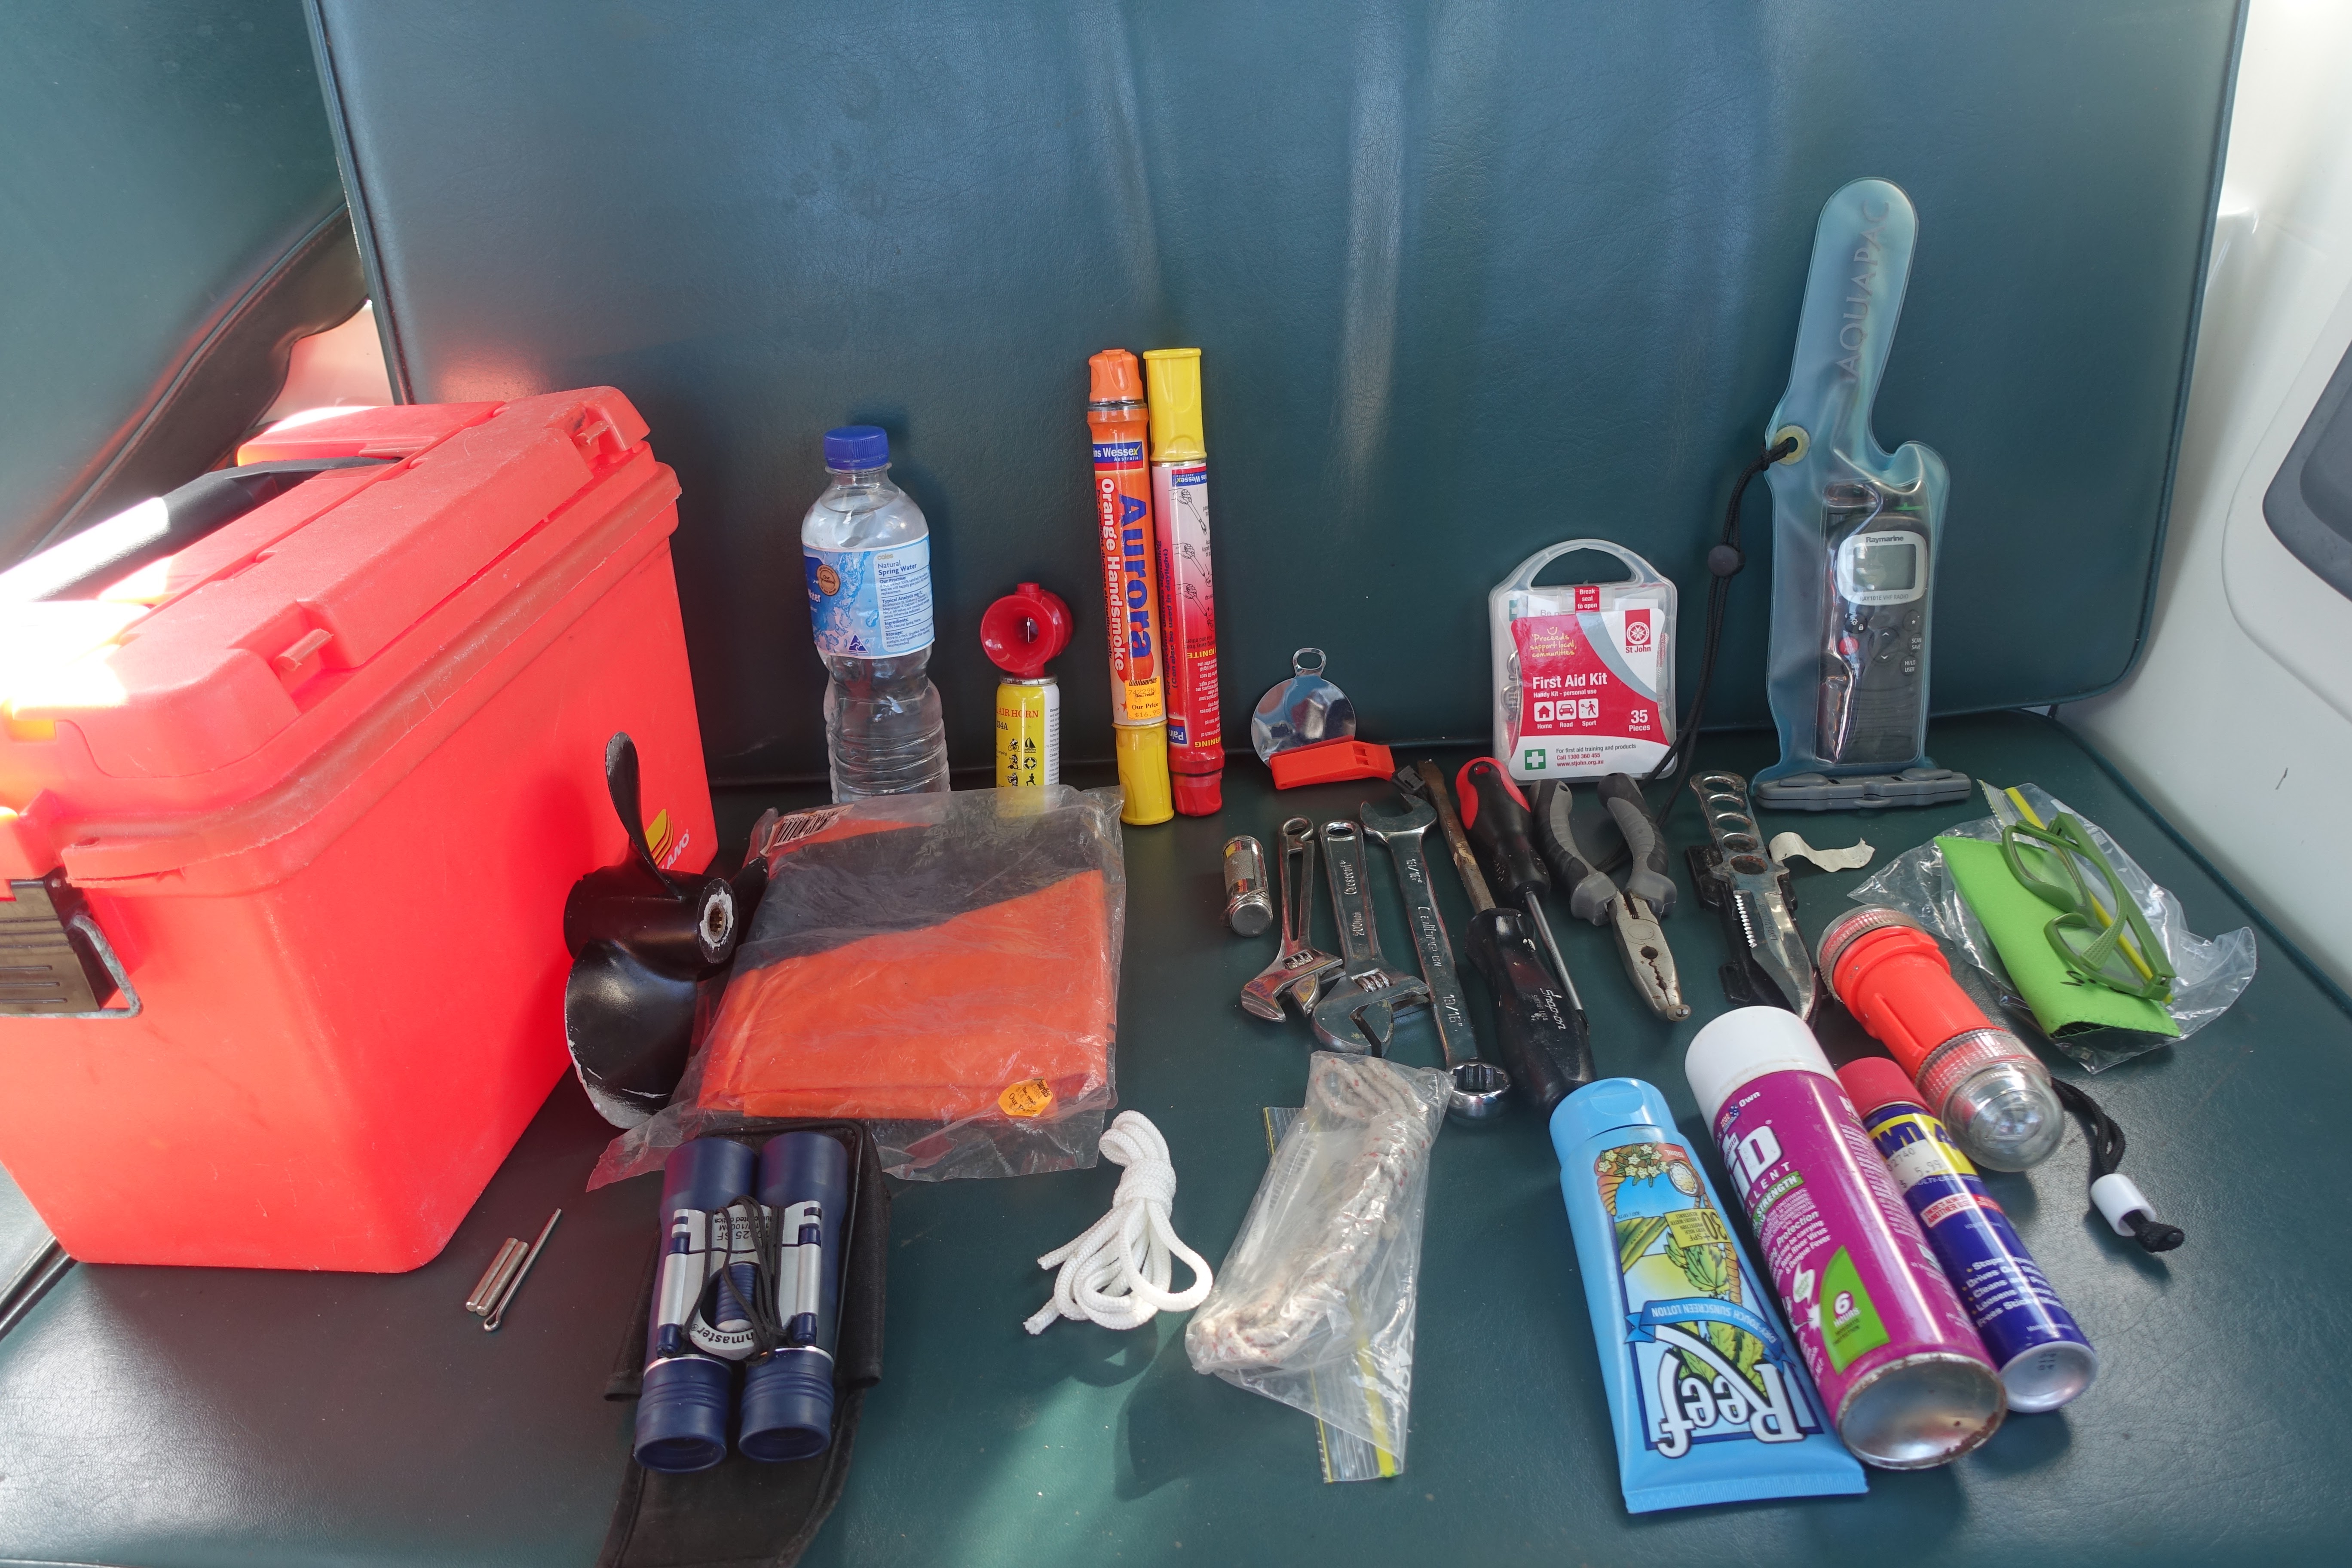 |
| Our tender safety box and the contents of what we carry. |
Our safety box is a medium size commercially available water resistant box. Into the box we put our outboard spares and these include dewatering fluid, start rope, shear pins, split pins, stainless plier, adjustable spanner, spark plugs, screw driver, propeller and the spanners to change them. We do carry a spare propeller as we have had more than experience where the rubber drive sheared and we lost or had reduced drive. While it appears to be a bit of an over kill by the manufacturer to have a shear pin and rubber drive fitted to the propeller to protect the gearbox. In our experiences the rubber protects the shear pin. We also have room for a V sheet, knife, a couple of flares, handheld VHF, a whistle, torch, small first aid kit, water, sunscreen, insect repellent. Someone said to add some waterproof matches to the list in case you need to light a fire on the beach, it’s a good idea and they take up next to no room. We have the basic tools to undertake minor motor repairs, and these have come in handy on a number of occasions. While carrying out the repair we were able to protect our selves with the basics like sunscreen and insect repellent. Having a drink of water didn’t go astray on those warm days either. While I hope we never need to use them we do have the basic signalling equipment to summon help or aid a rescue for ourselves or render assistance to some one else.
Don’t be tempted to use the V sheet as shelter from the rain if you do not need help. I heard of a case recently where a couple of guys out fishing put their girlfriends under the V sheet to keep the light rain off, a passing aircraft saw the V sheet and alerted the authorities, who arrived to find the embarrassed fishermen and girlfriends. However in situations where you require help use the V Sheet as protection while you are waiting for help to arrive. If we were going to the outer reef or find a remote anchorage empty I would also pack the vessels EPIRB in case we run into trouble. Trouble need not necessarily be related to the tender but could be a medical emergency, for example if one of the crew falls and injures themselves while ashore. The uninjured party may not be able to move the injured crew into the tender or for that matter get them from the tender back on to the main vessel.
 |
| While hard to see in the dark green pouch the small repair tool kit tucked away in under the cowl of the motor. |
 |
| The small tool kit supplied with the motor, we store ours under the cowl of the motor, better there when needed than on the boat rusting away in one of the lockers. While there is an emergency start cord you have to remove the pull start mechanism to use the cord, just keeping the cord on board the tender isn't enough |
 |
| Tender anchor chain and rode connected and ready to deploy, we keep ours in a bucket so if we don't get all the mud or sand off it doesnt coat the floor of the tender. |
 |
| Stainless steel cable fitted with a plastic hose to stop chafe should it rub against the tender tubes while in use. We like a large combination lock so we don't need to worry about losing the key. |
The additional gear we carry in the tender is, shoes, anchor, oars/paddles and bailer. The bits and pieces we keep in the tender are all secured on lanyards in case the worst happens and the tender capsizes. PFD’s can be secured into the tender with a stainless steel cable and padlock when you tie up at the dock while going ashore. Our anchor is rigged for use at a moments notice should it be needed to hold position. We keep shoes in the tender so we can wear them while stepping ashore. It’s better to find there are things on the beach that could slice your bare feet apart while you’re wearing shoes or sandals than if you weren’t.
 |
| Additional water proof storage attached under the seat |
 |
| Made from cheap easily available storm water plumbing pipe and glue. Sewerage pipe will also work but is more expensive and slightly heavier gauge wall thickness. |
To prolong your outboard motors life it’s a good idea to carry out monthly checks and engage in some proactive maintenance. Firstly buy or make a cover for the motor and fuel tank, keeping the sun and weather off can certainly extend the life of exposed components. A plastic fuel tank left exposed to the weather has a very limited life before it will become brittle and capable of splitting from internal pressure if the vent is closed. It’s worthwhile to get a small grease gun and marine grade grease and identify grease points and squeeze in fresh grease regularly. Learn how to check the gearbox oil level and condition. It doesn’t take long to give the outboard ten or fifteen minutes of your time once a month to do some preventative maintenance. I also try to flush the motor with fresh water after use, that’s not every day if using it daily but before storage for a week or more. It’s not always possible to do a fresh water flush when the water tanks are getting low, however if you have sufficient fresh water it is well worth the effort. When you can spare ten to fifteen litres of water, small motors can be held and run in a bucket but with larger motors you will not need much more water but a little ingenuity and mechanical help may be needed. I have seen a larger size bucket filled with water held in place with the motor lifting davit and clever cruisers have made electric camping showers connect to the flush port or ear muffs and use a bag to collect and recycle the water. I think it’s a case of finding an easy way to do an engine flush on your vessel and use it before storage.
Check over your inflatable tubes for nicks and scratches, again buy or have a cover made if you can afford it, the UV damage starts the moment its outside. While we didn’t understand the significance at the time, our inflatable was slowly being destroyed by the sun and was wearing away. The signs were a white/grey stain on our pants after sitting on the tubes, as it turns out this was the UV damaged layer coming off. The damage was happening for several years; eventually the outer cover was worn away and was almost down to the fabric. We didn’t really notice the wear until we had to replace a patch and found the height difference between the area under the patch and the surrounding area was very noticeable. On closer inspection of the tubes we saw just how thin the outer cover had become.
Other things to look at are if you have a tender with an inflatable floor it’s possible to get a build-up of sand and grit under the floor and over time this will damage the fabric. I have seen the inflatable tube under the floor cut to pieces after the boat was used to collect shells. Broken shell fragments worked their way under the floor boards and in no time the damage was done. The space between the hull and tubes of a RIB can also do with a clean out once a season or more depending on how you use your boat. Let down the tubes slightly and with a hose, spray in between hulls and tubes to clear out any sand and grit then reinflate the tubes.
Tender Checklist
If you don’t know what you’re looking at have some one skilled in engine repair go over some of the basics with you. Work safely; it can be dangerous when checking for spark on an outboard that will not start. Get to know and understand the safety aspects of dealing with high voltage and sparks around highly flammable fuel.
 |
| Carburettor, the drain screw is easy to see, the use of the screw does not guarantee any contaminates will drain out of the bowl |
 |
| After market fuel filter fitted to the fuel tank hose, this clear filter housing can give an instant up to date visual of the state of fuel in the tank and hose. |
 |
| Standard equipment fuel filter under the motor cowl, some only filter out large particles |
 |
| Water droplet in the carburetor fuel bowl, this was big enough to cause problems and was a common occurrence with our old four stroke. |
Checking the fuel system isn’t complicated once you know the lay out; but work carefully and don’t spill fuel. Most problems we have encountered are from water in the fuel or a clogged filter. If you remove the fuel filter flick the contents of the filter into a container, this will let you see the contents of the filter. Water will ball up in beads in the fuel and any debris will also be visible. Don’t just blow the filter out as this will not give you any idea of what’s causing flow problems. If you suspect water in the fuel and find small amounts in the filter, remove the fuel bowl off the carburettor and clean and dry it out before reassembly. Water in the fuel may also mean the whole system needs to be cleaned out, draining the fuel tank and lines then refilling with fresh fuel.
We had an ongoing problem with water in the carburettor bowl, once enough built up the motor would break down until we cleaned the carburettor bowl. How does water get into the fuel? In our experience it could from the vent on the tank cap. If your not transporting the motor in a vehicle you could leave the vent open. Rain showers or spray during rough weather could be enough to find a way into the tank.
As a visual check we installed a pre filter inserted in the main fuel line, water was going to be easy to see in the large filter housing, we didn't see any.
As it turned out this problem with water in the fuel wasn't from the fuel tank, the best explanation we can come up with is the water in our carburettor was from condensation in the bowl itself. After a intensive search for the cause we eliminated the fuel tank lines and filters, spent a lot of time and money chasing this particular problem. We never had the problem with our previous out board, we had the problem with the four stroke and then no longer had the problem once we sold on the four stroke, used the same fuel tank lines and filter on the new engine and all was good.
Unleaded fuel containing ethanol should not be used in outboard motors as it has been found that the ethanol can separate from the base fuel if left to sit for a while. Most fuel supply outlets now have instructions on the fuel pumps notifying customers not to use unleaded fuel containing ethanol in boats.
Make sure your two stroke outboard is running the correct oil fuel mixture (motor manufactures recommendation); there is nothing to be gained by using extra oil in the fuel, if there is too much oil in the fuel the motor will not perform as it should and can run lean as the oil replaces the fuel in the mixture and running lean can increase maintenance costs.
 |
| MOB Stop Lanyard |
 |
| A motor safety lanyard, in this case made from a short length of dyneema with a stainless steel clip for quick attachment |
What else? Make sure you have a safety lanyard attaching your motor to the tender (not to be confused with a motor stop MOB lanyard); just recently we witnessed the loss of an outboard. The owner didn’t have a lanyard attaching the motor to the outboard bracket, from what we saw it was a small motor that could be started in gear, while giving the motor a mighty pull on the start cord it jumped off the bracket, the owner held the throttle handle in his left hand. As the motor twisted the throttle opened up while the owner desperately tried to wrestle it back onto the outboard bracket. Unfortunately the motor won the tug of war and off it went to a watery grave spitting and spluttering as it sunk. This safety lanyard could be a short cable and padlock so your motor is still there when you come back with the shopping on re-supply day.
Use an additional safety lanyard when you remove the outboard, make sure that you have a safety line tied from the engine to the main vessel. Outboards can be heavy and if you lose balance or some crazy zooms into the anchorage while you’re doing the transfer and drop it in the water, you will be very glad to have that safety line in place.
Start the outboard first before casting off from the boat or jetty, not after. If you don't and the motor doesn’t start, you may firstly look silly, and secondly the tide will determine how hard you have to paddle against the current to get back to the boat. If the current is flowing strongly and your not making head way drop the anchor and you may need to wait it out.
Put on a life jacket before boarding; make sure that kids and people who are not strong swimmers do the same. Is climbing into the dinghy difficult for you or your crew? If it is you will need to plan your trip or work out ways to make it easier. To board use the painter to bring the dinghy as close as you can to the boat. I get in first and bring the dinghy up and across the boat's transom to make it easy to board for kids or those with short legs. When you step in the dinghy, try to get straight inside it putting your feet on the floor. Use a balancing rope, I have even see people use an extended topping lift or rope hung from the davits to hold while climbing aboard. Don’t stand on the on the side tube to get in, depending on the design of the vessel stern, it may be better to get the little ones and older people to sit on the tubes or swim deck then slide into the tender. Once one of the crew is on board ask others to hop on board but don’t jump in as this can be unstable. It can certainly make people stumble around in the boat, there is a strong possibility falling on to others in the tender, or stubbing toes or standing on things on the floor. Make sure to spread the load and not have all the weight on one side or in the aft, and do not overload the tender read the capacity label.
For the first trip of the day warm the motor up, get in the tender first and run the motor on low RPM for a couple of minutes to make sure it starts and is running smoothly while you load the passengers and luggage. Like any other trip, plan ahead, make sure you have enough supplies, fuel, water, food for the trip your about to embark on.
When using the tender at night it’s a legal requirement to carry a torch at a minimum to mark your presence or attract attention. We store a torch and a few other bits in an under seat storage canister made from 90 millimetre stormwater pipe and fittings. A good torch can be used to spot obstacles like anchored boats, crab pot floats, mooring buoys and to help find your boat in the dark. Mark your boat before heading to the beach for the night, we have put several bands of SOLAS reflective tape high up on the mast to give us a good visual which is our boat in the anchorage by shining a torch around. If you know you’re not going to return before dark turn on a few lights and don’t forget your anchor light.
 |
| Quiet Sundowners Towed Stern Too stops the gargling and the dog lapping at water noises |
So when it’s time to be enjoying sun-downers in the cockpit or you’re headed off to bed we have found a tender will make all sorts of noises. It might gently or noisily tap against the hull or make slapping sounds like it’s a dog noisily drinking water. In the past we would pick ours up out of the water of an evening so it didn’t ruin the serenity as we were enjoying our drinks. On investigation we found that like a lot of RIB’s there is a pocket or tunnel that forms where the tubes join the hull, it’s the motion of the waves in this pocket that makes all the noise. The solution that works for us is to tie the dinghy with its bow the other way. That’s right facing away from the boat, turn it around 180˚ from the usual towing position and secure it from the stern on one or two short painters while you’re enjoying your time in the cockpit. The tender stern with the motor on is heavier and rides deeper in the water, so there are no pockets for the waves to slap and slosh into. Problem solved the drinking water noise disappears and with two painters securing it we found that it didn’t sneak up the side of the boat and tap on the hull at O’ dark thirty.
 |
| Large inspection port used as a quick drain for when the tender is on the davits, could also double as an anti theft device if removed when on the beach. |
 |
| Ready to go the large stern drain has the cover in place the motor is locked and has a safety lanyard. |
Tenders hanging from the aft davits or for that matter any tenders stored upright on deck or over the side need some way of clearing the water quickly so as not to put a large strain on the davits, deck chocks or halyards. During a heavy down pore it doesn’t take much to overwhelm the small drain hole most tenders have. A leaf, loose line or just the shear volume of water during a storm can quickly see a tender fill with water. To help clear water from inside the tender we installed an inspection hatch in the transom. If we are in a heavy downpour or take a large wave over the stern the water can quickly empty. Also when we tie up at the beach and are going to be out of sight of the tender we can take the inspection plate with us, anyone wanting to steal the tender is going to have to try and row a water filled inflatable away unless of course they carry their own motor kill switch lanyard.
Another lesson learnt. During a trip south to Tasmania we lost our tender one evening while anchored in Twofold Bay. Following along with the proverb: the battle was lost because of a nail. Our story started in Jervis Bay when I injured myself; I had a fall while over extending to get one of the davit lifting lines. When in Eden I returned to the vessel one afternoon the worst for wear due to the injuries I sustained in Jervis Bay rather than lifting the tender up out of the water I secured just the painter to the back of the boat. Some time during the evening the clip securing the painter came apart. Off went the tender on a nocturnal trip finishing upside down on the rocks at the southern end of the bay. We did get the tender back and after a new motor, some patches and work tidying up the numerous scratches we had a tender again. So what was our nail? A short length of line was all that was needed so I didn’t need to over extend to start picking up the tender into the davits. We now have extended both davit lines so we don’t have to over extend to start the retrieval process. Now we secure the tender in two places to the vessel if we don’t pick it up out of the water.
 |
| A simple fuel tank cover made from sunbrella canvas and sewed on board using a house hold sewing machine we keep as much of the hoses under cover as well, |
 |
| Fuel tank secured in place so it will not fall out, this tank is starting to show sun damage, its best to cover the tank from new to stop the sun damage. |
What else? Securely mount (tie or strap) your loose items including the fuel tank into the tender. We were hoisting the tender up into the davits one windy afternoon as we got ready to sail back across the bay. About half way up into the cradle a strong wind bullet caught the tender turning it onto its side trying to spill the contents into the bay. Everything but the fuel tank was secured in some way. To cut a long story short we were able to up anchor and give chase to the tank as it was quickly disappearing on the outgoing tide. Luckily the only loss was the fuel in the tank that we had to dispose of on shore at a disposal station due to contamination, sea water had trickled in the vent as it floated away semi submerged.
Something that has fallen from grace over the years is the use of a long painter to tie up at the local jetty; the reason to do this is to allow others to get in to the jetty by being able to move your tender off to the side. If you tie up tight then only a very limited number of tenders can tie up and use the jetty at one time, and as we know that with beach parties the more the merrier.
Lastly and very important, when you finally get to the anchorage or jetty and before you start manoeuvring your boat, shorten the painter until the dinghy almost touches the boat. This should stop the painter from getting fouled in the boat propeller.
Lipo Technology Private Limited offers UV Nylon Cable Tie, designed for high durability and resistance to harsh outdoor conditions. Made from premium UV-stabilized nylon, these ties prevent degradation from sunlight, ensuring long-lasting performance. Ideal for electrical, automotive, and industrial use, our cable ties provide secure bundling. Choose us for reliable, high-quality solutions.
ReplyDeleteReally enjoyed reading about your tender experiences—very honest and relatable. These real-life lessons are helpful for anyone living aboard and learning as they go. Stories like this also highlight when it’s time to get rid of non-running boatsituations before they become a bigger hassle.
ReplyDeleteRead more also: http://boatliquidator.com