Not knowing how to remove wooden plugs can
do damage to the surrounding timbers. There are a couple of documented ways to remove plugs but some just don't work properly with the modern builds and epoxy adhesives. One method I have seen is to to drill a pilot hole in the plug to be removed and then drive in a screw to push/pull the plug out. I have never found this to be very successful and only end up with small bits and pieces of the plug falling apart. But I could never get the whole plug to come out in one piece.
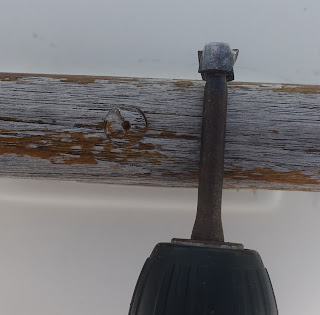
So to remove a plug quickly and easily I use a Forstner drill bit in an electric drill. Why a Forstner drill bit?? as seen on the right Forstner bits will cut almost flat to the bottom of the hole, the bit is easy to control and the cut is smooth with minimal tear-out on the top surface. Unlike the normal twist bit that would create tear-out around the hole and more than likely remove the head off the screw before removing all the wooden plug.
These specialist bits are not usually found at your local hardware, however you will find them at wood working machinery/tool suppliers. The most common size plugs are 3/8” and ½” of course those of you with European vessels will find the imperial plug sizes are close to metric equivalent or vice versa and will work.
Removing the plug is relatively straight forward, find the center of the plug by eyeballing the edge of the drill bit with the outer ring of the plug. Use the drill on slow speed and using light pressure carefully drill through the old plug. Be careful not to place too much pressure on the drill so that when it cuts through the wooden plug it doesn’t damage the screw head under the plug.
Once you have drilled out the plugs more than likely you may find the head of the screw is full of adhesive and trying to use your screw
driver isn’t going to work. Use a scribe to remove the old adhesive out of the screw slot. If the screw head is damaged screw extractors
are available and work a treat.
When the job is done and the panel is
screwed back in place you can buy plugs from the chandlers, however if you
don’t want to pay the inflated prices the chandlers charge for the wooden
plugs you can cut your own very easily. A
plug cutter tool bit is available at the wood working machinery suppliers. Then you
will need timber to make into plugs, I usually wait until a see someone
undertaking work and then when they are cleaning up ask for off cuts that were
headed to the bin.
If you find previous work has damaged the
timber work around the wooden plugs, go up a size is the simple answer but to
do this will involve plugging the hole, saw off the excess and sand smooth. Once
the glue has set center the drill on the new plug and cut a new hole. A damaged
3/8” hole will easily take a ½“ plug, if you need larger plug to cover the
damaged area then you may need to cut plugs yourself.
 | ||||||||||||||||||
Lightly sand the plug flush with the surface
|


No comments:
Post a Comment